
Home » Get with the program
Get with the program
Push the right buttons and the Spinny S140 Advance pallet wrapper will get right to work wrapping pallets perfectly. However, what happens when other buttons are pushed, and the original setting is lost to time? We share the easy ways to simply re-set your S140.
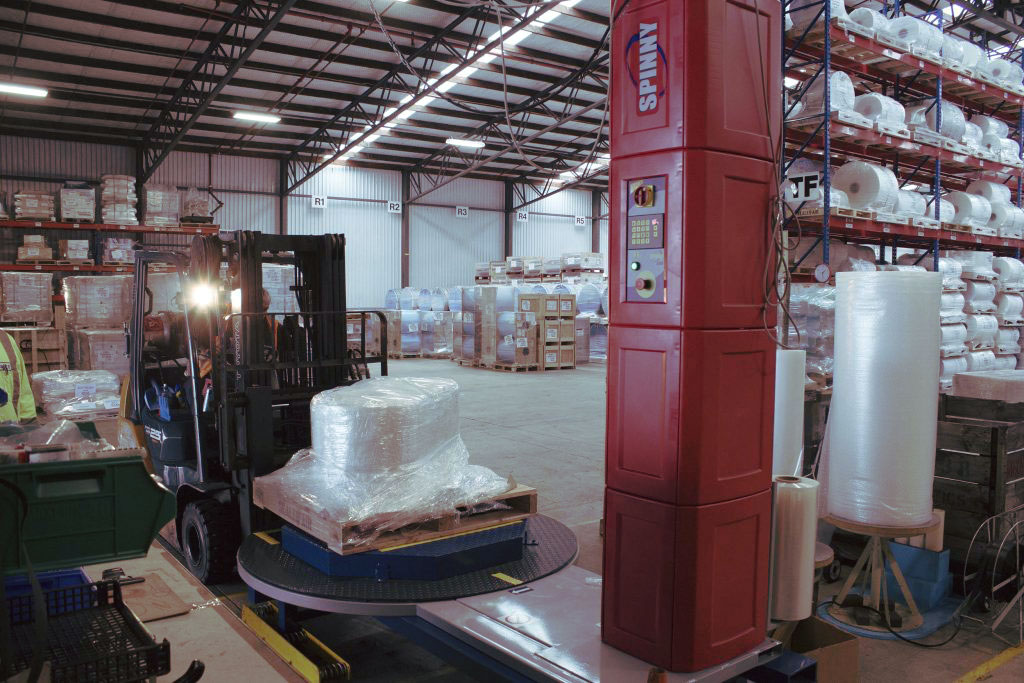
Like most machines made to cover a variety of different applications, the Spinny S140 Advance takes some initial programming to ensure it’s wrapping right each time, every time. Once this is achieved it is generally plain sailing.
Sometimes though a key setting might disappear. When this occurs it can be a frustrating and time-consuming process setting things right. Thankfully there’s a manual, this article and, if all else fails, our support team ready and willing to help out.
What’s available?
The S140 has the capacity for you to program four individual, customised wrap cycles, which means you can set different wrap patterns for different pallet profiles. You may need a heavier wrap program for bulky loads with less stability, while light, even loads might require minimal wrapping. Each of these can be programmed into the Spinny using the control panel. For anything that doesn’t fit your four programmed profiles (if a load needs extra wrap, for example) it’s easy to achieve this manually.
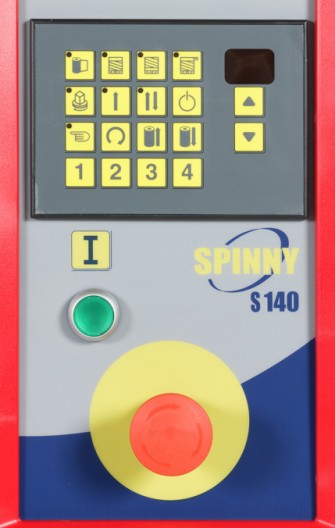
Which button is which?
Let’s go row by row. On the top left is the film tension button, then the button for setting the number of top wraps, the number of bottom wraps then, lastly, the overwrap button, which sets the amount of film to be wrapped on top of the load.
In the second row, we have turntable speed, single wrap cycle, double wrap cycle and the all-important power on button.
Row number three has the manual buttons. There’s the manual cycle button, the button for adjusting speed of the wrap carriage as it moves up, and the button for changing the speed of the carriage as it moves down.
The bottom row are the numbered wrap cycles, which can be pressed to activate each programmed cycle. The up and down buttons to the right of the control panel are used to program each element of a cycle.
The big red main switch powers on the machine and the big green button will start the cycle. The big red button can be pressed to turn everything off in an emergency.
How to program a wrap cycle
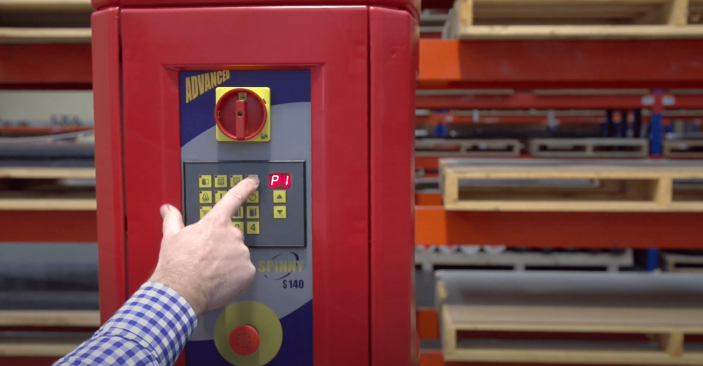
First, unlock the wrap program function by turning the power switch to off, then holding the tension button down while turning the switch back on. Unlock the machine by pressing the top line of buttons in sequence from left to right.
To set each function of your program, press the button for the setting you wish to change. Then use the up and down arrows to set the number.
For a standard wrap cycle, set the functions as follows:
- set tension at 5, top wrap at 2, bottom wrap at 2, overwrap at 0.1, turntable speed at 15, choose double wrap cycle, then set carriage speed up and down both at 9.
- Then turn the machine off for a few seconds using the power switch.
- When you switch it back on, the machine will be programmed and ready to go on this setting.
- Press the power on button and then the green start button to start wrapping.
For a heavy wrap cycle:
- Set tension at 5, top wrap at 3, bottom wrap at 4, overwrap at 0.3, turntable speed at 13, select single wrap, carriage up at 6, carriage down at 8.
- Again, turn the machine off and restart it to set the program.
- Press the power on and green button to get started with this setting.
- Using this cycle, the machine will stop once it has reached the top of the pallet, giving you time to attach the top wrap.
- Once you have covered the top, press the flashing double wrap button to complete the cycle.
Beginning and adjusting a wrap cycle
Before you start the program, begin by attaching the wrap to the pallet. Then, press the program button you need and then the green start button. When the cycle finishes, cut the stretch film end and tuck it away so it doesn’t unwind.
To manually adjust or reinforce the wrap during the cycle: press and hold the green start button. This will stop the wrap carriage from moving up and down but the pallet will continue to rotate, giving more reinforcement to a certain area.
Release the button and the carriage will continue moving up or down. Increase the tension of the wrap using the up and down arrow keys as the wrap is underway.
The manual button (the one with the hand on it) allows you to manually rotate the turntable by pressing and holding it along with the next button to the right of the hand button. This will make the turntable rotate slowly – simply release the button to stop.
The wrap carriage can also be manually lowered and heightened to give extra reinforcement to a certain area using the last two buttons on that third row.
Hold them in to move the carriage and, again, simply release the buttons to stop.
Ready to spin?
Once you have your programmed settings in and become familiar with the control panel, the Spinny S140 Advance is easy to use.
For those visual thinkers out there, click here to view a video of these instructions.
And if you have any other questions simply get in touch with our team on 0800 700 000.